
How to use Real-time Subtitles
Last updated: October 9, 2026
Real-time subtitles add AI subtitles to a live stream, translate them into the languages you choose, and can also add an AI voice-over that reads the translations aloud as extra audio tracks. The feature is easy to use but requires contacting support before the first use. Just ask us to enable the feature and we will!
If you want to see a demo, you can see one here .
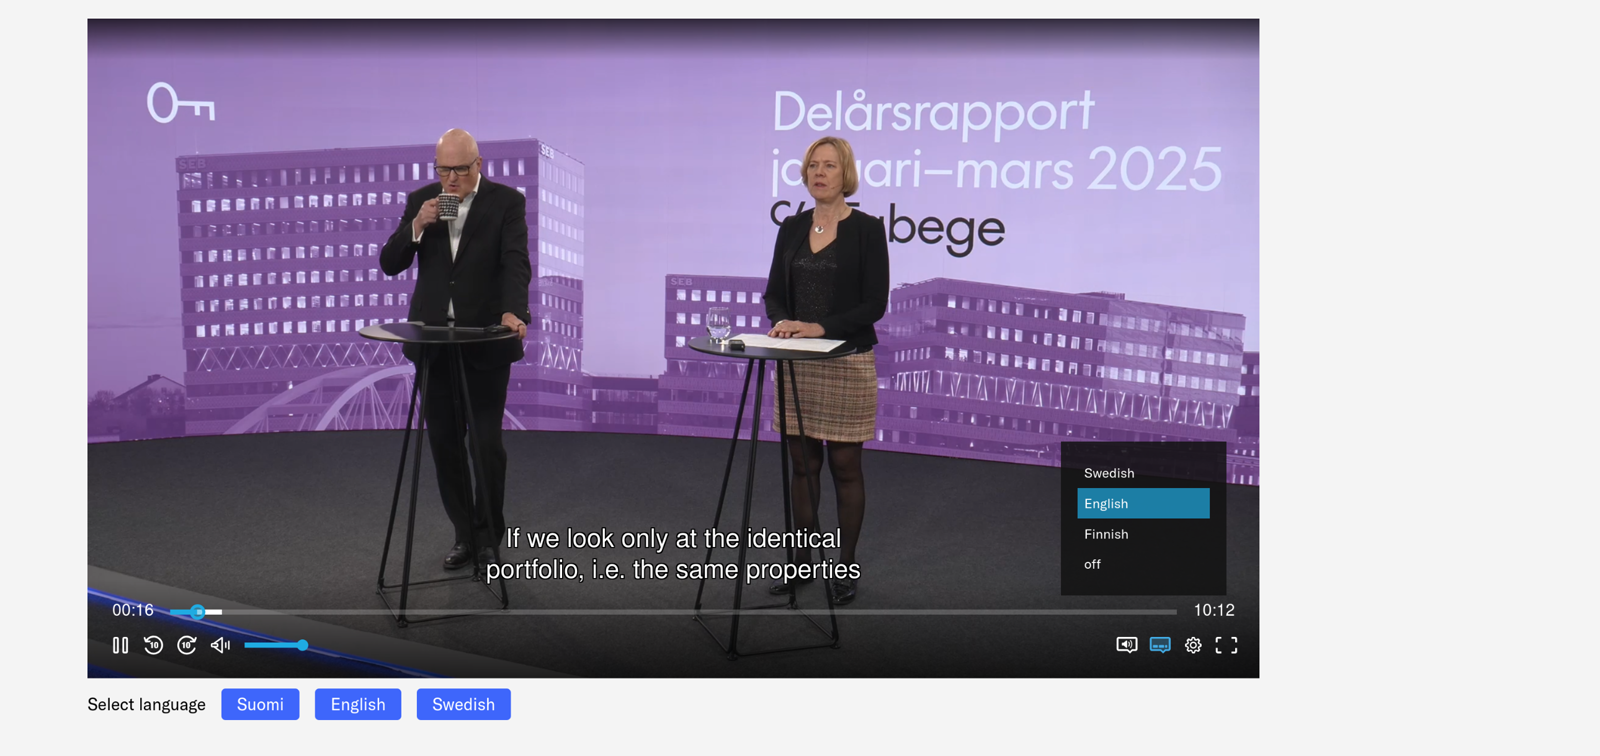
Language settings
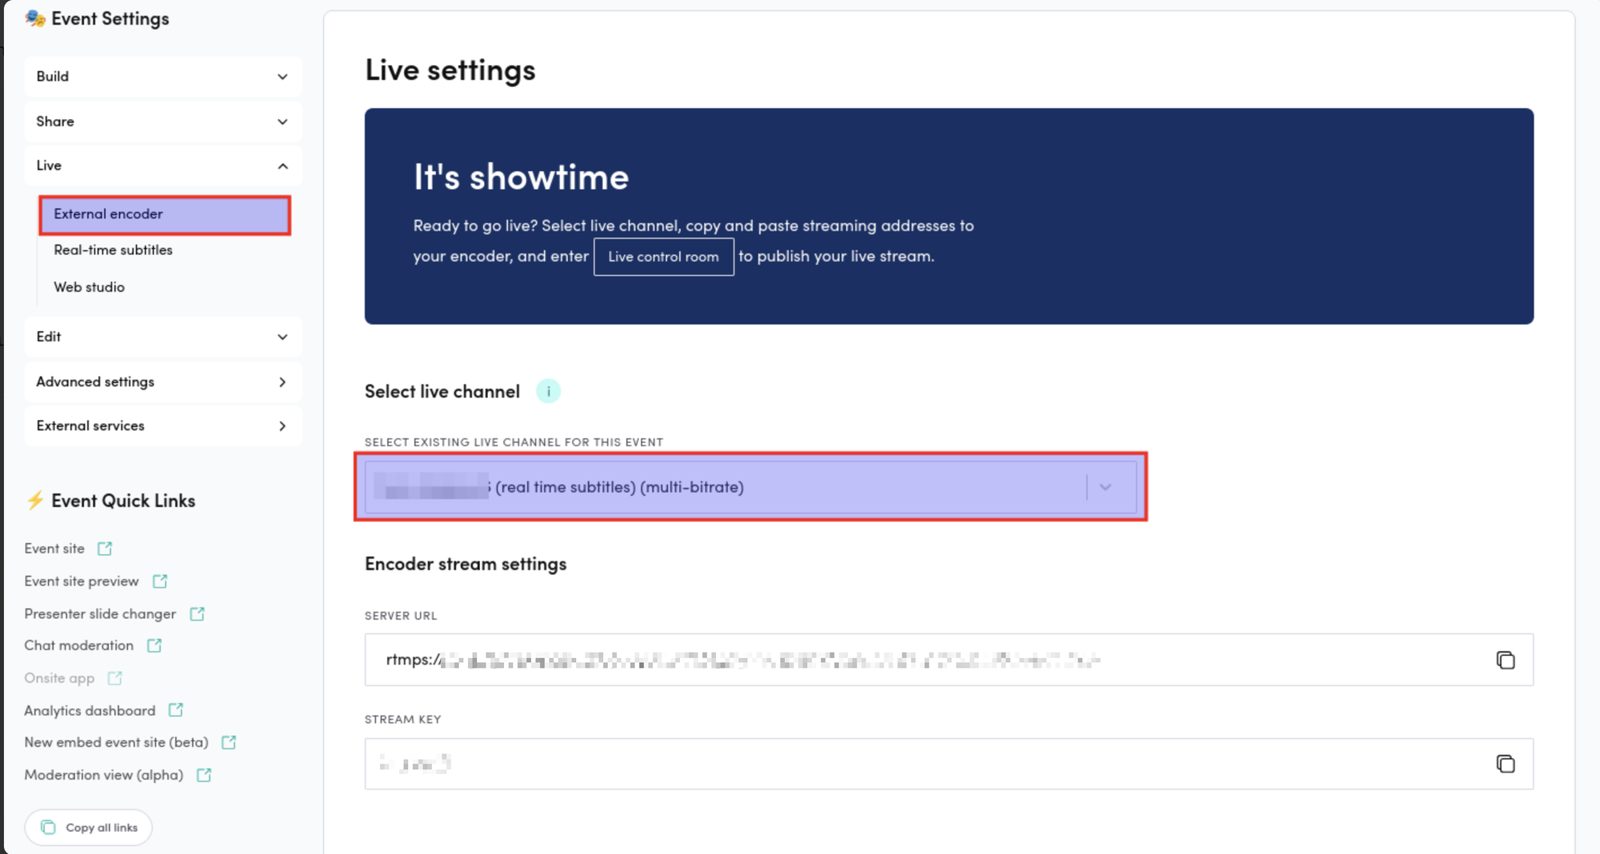
- Make sure that you have Real-time Subtitles compatible live channel selected. If support has enabled Real-time subtitles but you can’t see Real-time subtitles in the menu under the Live section, you most probably don’t have the Real-time subtitles compatible live channel selected. You pick the channel under Live → External encoder, and the right one usually has real time subtitles in its name.
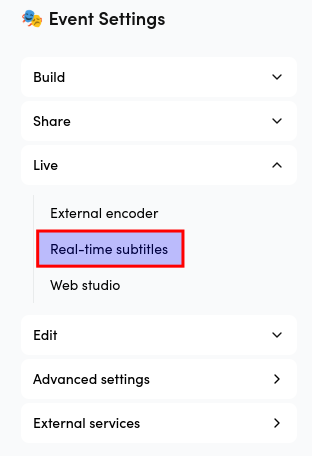
- When you have the right live channel selected, you can find Real-time subtitles under the Live section of the Event Admin menu. Click it to open the settings. If the page tells you the chosen live channel is not real-time subtitles capable, go back to External encoder and pick another channel, or contact support to have one enabled.
-
Turn on Show subtitles at the top of the page. This is what makes the subtitles appear in the player on your event page. Save the event afterwards. It is the same setting as Enable subtitles under Edit → Subtitles and transcripts, so you only need to turn it on in one of the two places.
-
Choose the Source language. This is the language that is spoken in the stream. If more than one language is spoken, for example a panel discussion that switches between Finnish and English, choose Multilingual (auto-detect) instead of a single language.
When you choose Multilingual (auto-detect), an Expected languages field appears. It is optional: leave it empty and any supported language is detected. Listing the languages you expect to hear in the stream improves the accuracy of the transcription, so fill it in when you know what will be spoken. If you list a language the automatic detection does not support, it is skipped and the page tells you which one.
-
Choose the Translation engine, the AI engine that translates the subtitles. We recommend Gemini. If one of your chosen languages is not supported by the engine you pick, a supported engine is used automatically for that language, and the language row shows which one.
-
Pick your translations. The source language is always shown to viewers as subtitles, so it is not in the translation list. If you pick no translations, viewers get subtitles in the spoken language only.
-
Optionally turn on Voice-over for individual languages in the Selected translations list. Voice-over produces a spoken AI translation as an extra audio track on the stream, not a subtitle track. See AI voice-over below.
-
Check the panel next to the settings. It sums up your selection and the estimated duration from your event settings, and on accounts that show pricing, an estimated cost.
-
Click Save Language Settings. If a language you picked turns out not to be supported, the settings are still saved and a notification tells you which languages were skipped.
Show subtitles and the keywords are saved with the event’s own Save button in the top bar. The languages, the engine and the voice-over selections are saved with Save Language Settings. Save the event first: while it has unsaved changes, Save Language Settings is disabled.
Billing
Real-time subtitles are billed by active minutes, meaning the minutes when your encoder is streaming and the subtitle service is running. The estimate in the admin is based on the event duration in your event settings, and the final bill reflects the actual active time. Set-up fees may apply, so check with your Videosync contact before use.
Turning the service on and off
- You turn on the service before the event by clicking Start subtitled stream in the Live control room. Seeing this button requires having the Real-time subtitles capable live channel selected.
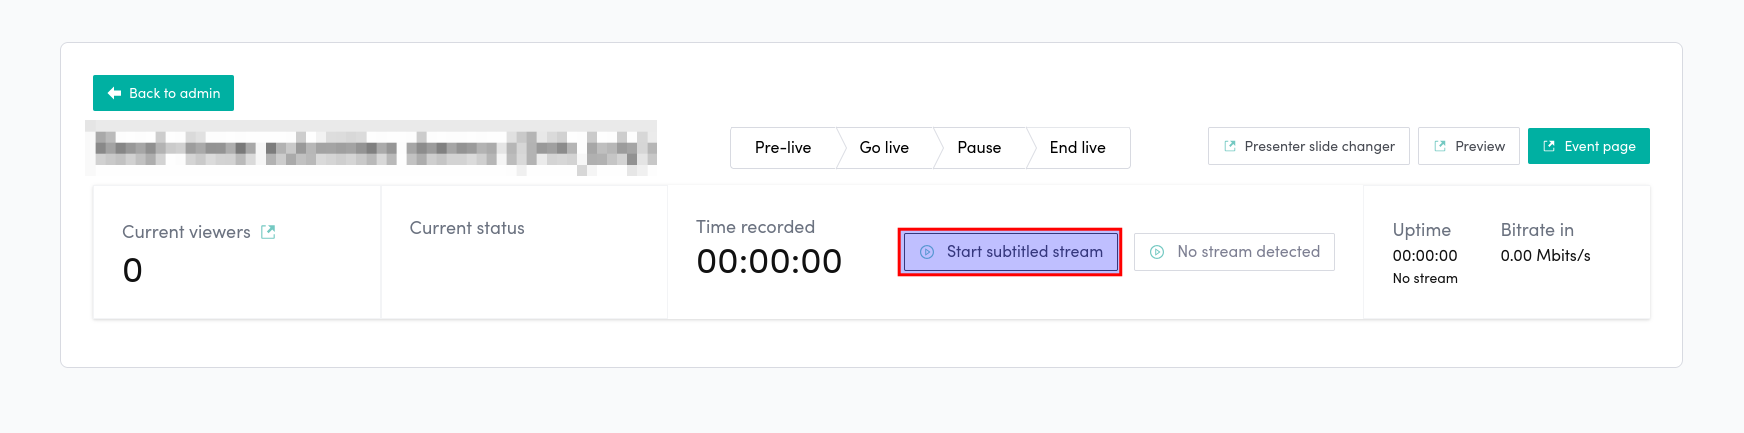
- Turn the service on 5–10 minutes before you need it. Starting it can take up to 5 minutes depending on the load on the servers, and until the service is running, viewers see nothing on the event page at all, neither the subtitles nor the stream itself. While it starts, the button reads Initializing subtitled stream.
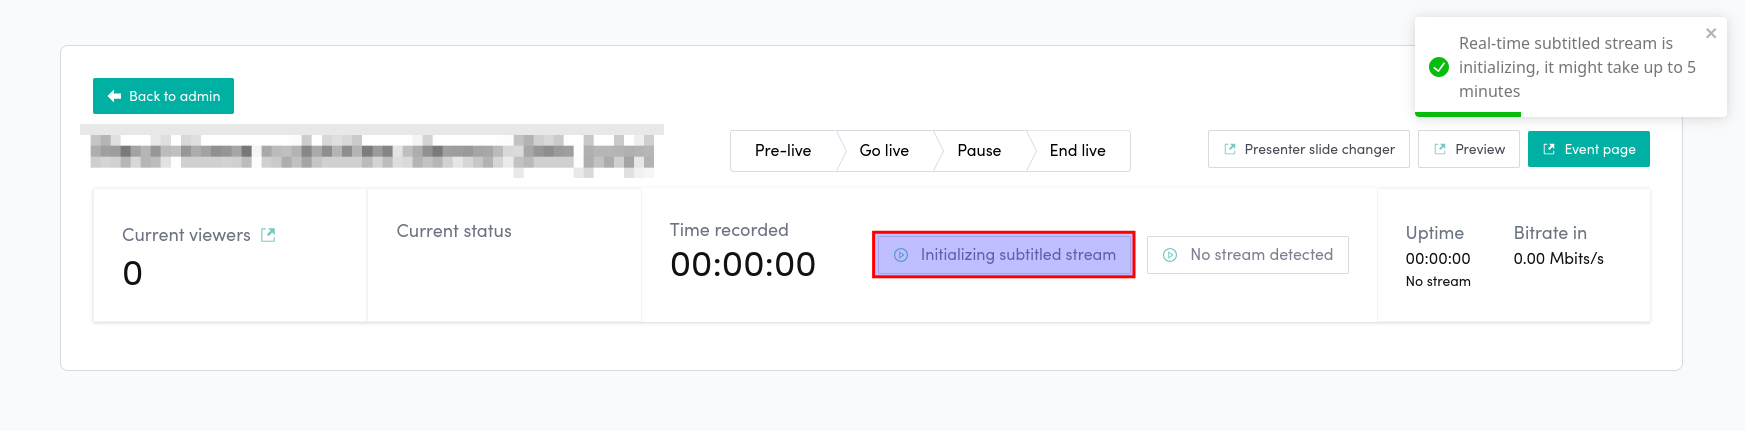
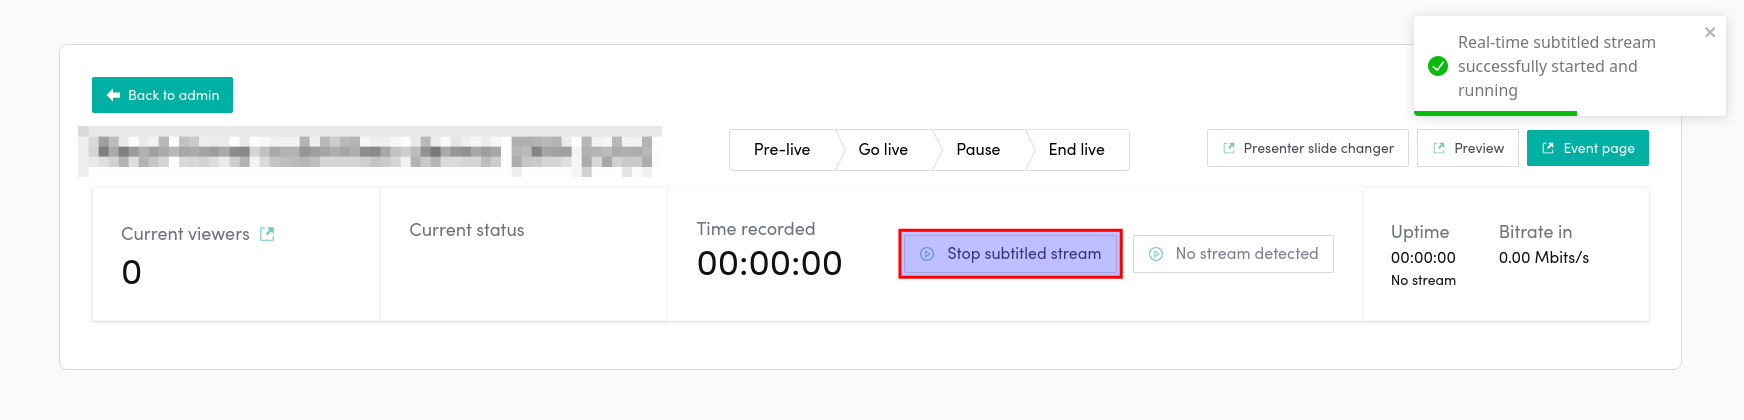
- Once the Real-time Subtitles service is up and running, you will see a notification and there will be Stop subtitled stream text in the button.
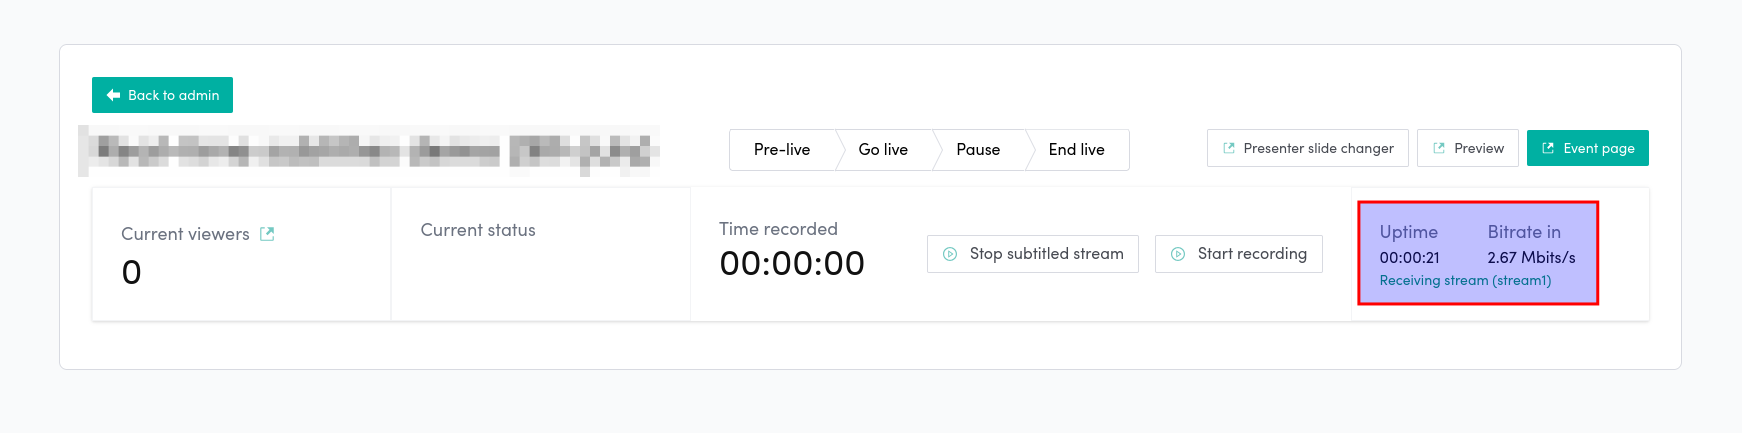
- When the Real-time Subtitles service is up and running, you can start streaming to the live channel from your encoder with the RTMPS URL and stream key used by the Real-time Subtitles compatible live channel. You can see Bitrate in showing when Videosync is receiving your stream, but you should be aware that the delay with Real-time Subtitles capable live channel is 60 seconds.
- Ending the stream. When you are ready to end the stream, it is recommended to set the event to End live state first, then click Stop subtitled stream and after that stop the encoder.
AI voice-over
Voice-over turns a translation into speech. For every language you tick Voice-over for, the stream gets an additional audio track in that language, on top of the original audio. Viewers switch between them from the audio track selector in the player, the same way they would switch between interpreted feeds. Voice-over does not replace the subtitles. The subtitle tracks stay as they are, and a viewer can listen in one language and read in another.
Voice-over is not available for every language. The page checks the current availability for each language you have selected, and greys out the tick box with the note Voice-over is not available for this language where it cannot be produced. If the check cannot be completed for a language, voice-over is left off for that language and a notification after saving asks you to save again. Nothing unverified is turned on, so you are not billed for a voice-over that would not have been produced.
A language with voice-over costs the same as one more translation language, so a language you both translate and voice over counts twice in the estimate.
Default audio track
As soon as one language has voice-over, the stream has more than one audio track, and a Default audio track setting appears on the page. It decides which track the player starts with:
- Automatic lets the player choose. In browsers that means the viewer’s own language. A viewer whose browser is set to a language you produced a voice-over for hears that voice-over, and everyone else hears the original audio.
- The option marked (source), which is your source language, starts everyone on the original audio, whatever their browser language is. This is pre-selected for you when you turn on the first voice-over.
- Any voice-over language starts everyone on that AI voice-over.
The default audio track belongs to the live channel, not to the event, so it also applies to other events that use the same live channel. You can edit the same setting under Live → External encoder.
Keywords
Names and acronyms the AI would otherwise hear wrong (is the CEO Kathy or Kati?) are managed in the Keyword bank section on this page. The bank is account-wide and shared with automatic transcripts. See Keyword bank for how to set it up.
FAQ
Will I be able to download the subtitles or use them in the VOD?
The Real-time Subtitles is used for real-time subtitles and they can’t be used for the recording directly. The same goes for AI voice-over: the extra audio tracks exist on the live stream only and are not carried over to the recording. If you need translated subtitles for the VOD, you can order VOD subtitles with Amberscript (Edit → Subtitles and transcripts → Order transcript or subtitles). The translated subtitles aren’t exactly the same but we have tools for creating translated subtitles.
Can I change the appearance of the subtitles?
Yes, you can do it via CSS. For example, this snippet gives the subtitles semi-transparent black background, sets the font and shows how to edit other relevant parameters:
/* BLACK BACKGROUND FOR THE SUBTITLES */
.bmpui-ui-uicontainer .bmpui-ui-subtitle-overlay {
    display: inline !important;
}
.bmpui-ui-subtitle-label {
  display: inline !important; /* Ensures it doesn’t force full width */
}
.bmpui-ui-subtitle-label span {
  display: inline !important;
  background-color: rgba(0, 0, 0, .75) !important;
  padding: 7px 5px 2px 7px !important;
  line-height: 1.6 !important;
  font-family: Arial, Helvetica, sans-serif !important;
}
Feel free to tweak it for your needs!
I can’t see my subtitles. What to do?
First, make sure that Show subtitles is on at the top of the Real-time subtitles page and that you have saved the event. Then make sure that you have chosen subtitles in the lower right corner of the video player.
If viewers see no picture either, the usual cause is that the encoder was started before the subtitle service was ready. The service has to be running first. Without it nothing plays on the event page, subtitles or not. To recover, click Stop subtitled stream in the Live control room and stop your encoder. Then click Start subtitled stream, and start the encoder again once the service is running.
My real-time subtitles are out of sync. How to fix that?
AI-generated subtitles that are created real-time aren’t always perfect in terms of content nor timing. But if there is delay that is something like 2 seconds or more, it might be synchronization issue which might happen when starting the stream. To fix it, click Stop subtitled stream in the Live control room and stop your encoder. Then click Start subtitled stream, and start the encoder again once the service is running. This most often fixes the real-time subtitles synchronization inaccuracies.
Can I have more than one spoken language in the same stream?
Yes. Choose Multilingual (auto-detect) as the source language instead of a single language, and the spoken language is detected as the stream runs. List the languages you expect under Expected languages to make the detection more accurate.